Day 85 (Project-6): Deploying Node.js App on AWS ECS Fargate and ECR

Hey there, tech enthusiasts! Today, I'm thrilled to walk you through an exciting project - deploying a Node.js application on AWS ECS Fargate and ECR. Let's dive in and explore the intricacies of this deployment journey!
Prerequisites
Before we dive into deployment, let's ensure you have everything you need:
Dockerfile Familiarity: We assume you're comfortable with writing a Dockerfile to containerize your Node.js application.
Access to AWS Management Console: Make sure you have access to the AWS Management Console to perform necessary configurations.
Basic EC2 Instance Knowledge: Understanding the basics of setting up an EC2 instance will be beneficial.
Project Description 📝
In this project, we'll leverage the power of AWS ECS Fargate and ECR to deploy our Node.js application. Here's what's in store:
Node.js Application: We'll kick things off by getting our hands on a Node.js application from GitHub.
Dockerfile Setup: We'll build a Dockerfile to containerize our Node.js application, ensuring it's ready for deployment.
AWS ECR Configuration: We'll set up a repository in AWS ECR to store our Docker images securely.
IAM Setup: We'll configure IAM user permissions and attach policies to grant necessary access for ECR interaction.
AWS CLI Installation: We'll install and configure the AWS CLI on our EC2 instance for seamless AWS interaction.
Pushing Image to ECR: We'll push our Docker image to ECR, ensuring it's readily available for deployment.
AWS ECS Configuration: We'll create an ECS cluster, configure task definitions, and deploy our application using AWS Fargate's serverless capabilities.
Security Group Setup: We'll configure security groups to ensure our application is accessible securely.
Project Execution: We'll execute each step meticulously, ensuring a smooth deployment process.
Project Live Demonstration: Finally, we'll access our deployed application and witness our deployment in action!
Project Steps
Let's break down the deployment process into manageable steps:
1. Cloning the Source Code from GitHub
Retrieve the URL of your Node.js application's source code from your GitHub repository.
Create an EC2 instance using the AWS Management Console.
Clone the GitHub repository onto the EC2 instance to access your application code.
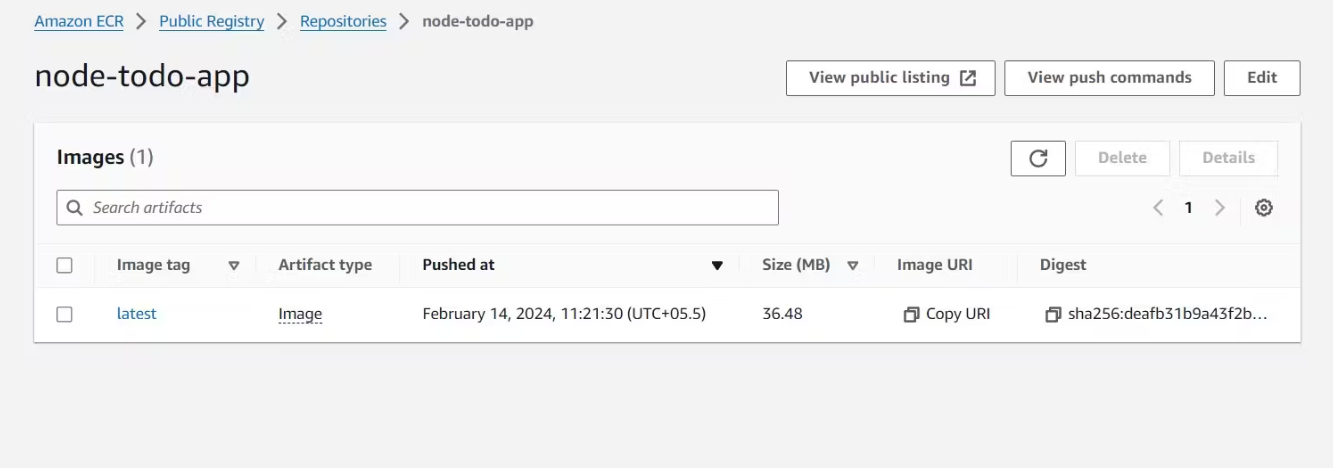
2. Configuring Image in AWS ECR
Navigate to AWS ECR and create a repository to store your Docker images, customizing settings as needed.
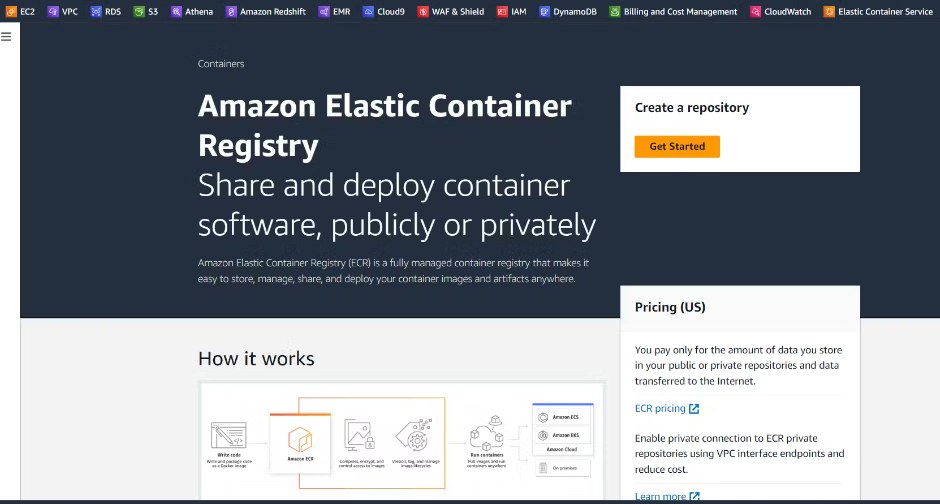
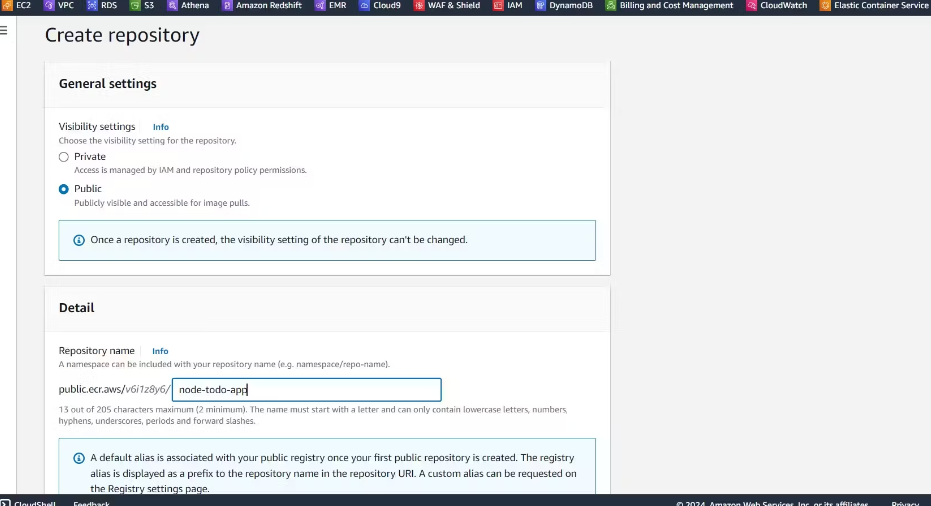
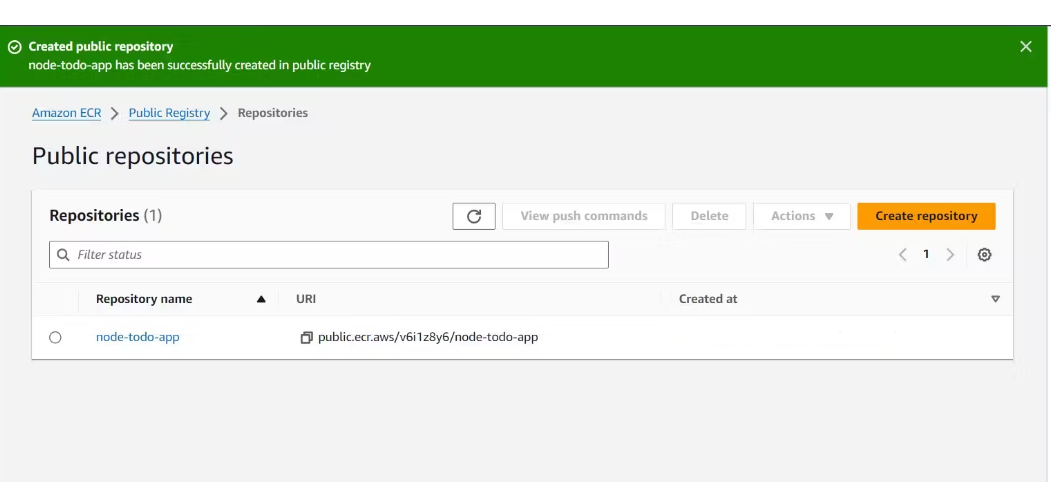
Verify the creation and review configuration settings.
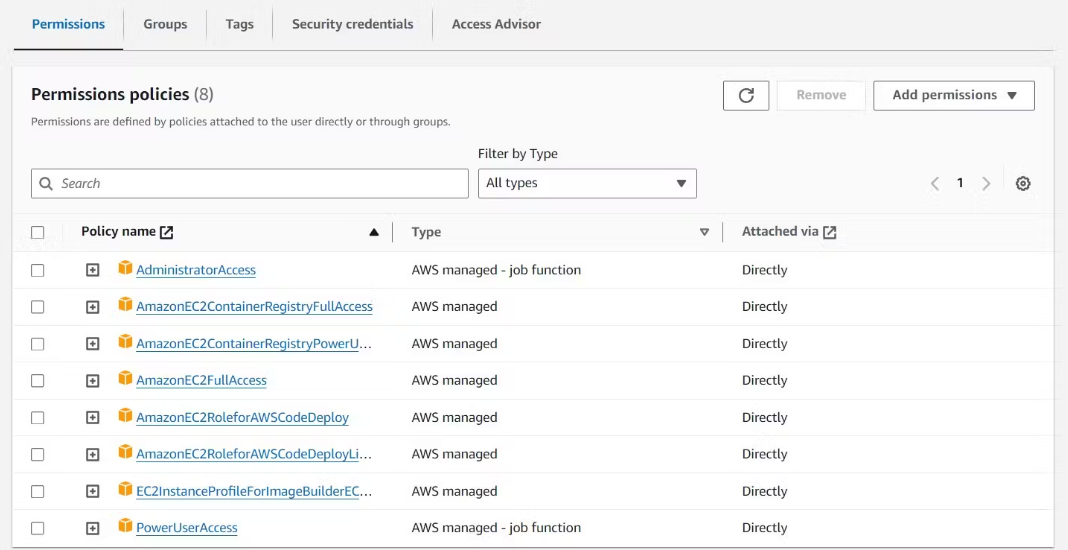
3. Configuring IAM
Create an IAM user in the AWS Management Console with permissions to access ECR.
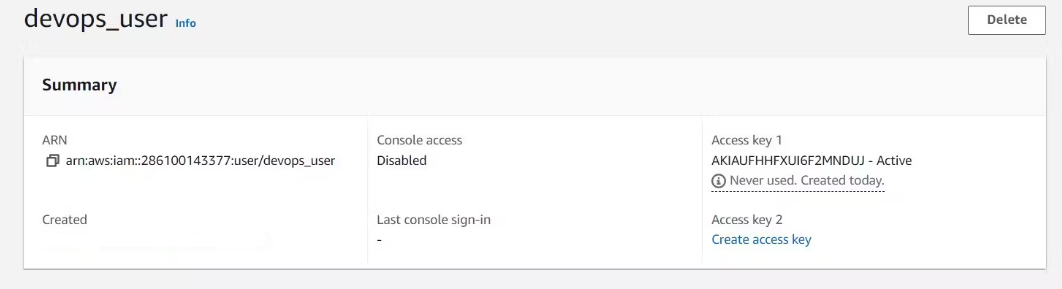
Attach policies granting necessary permissions for ECR access to the IAM user.
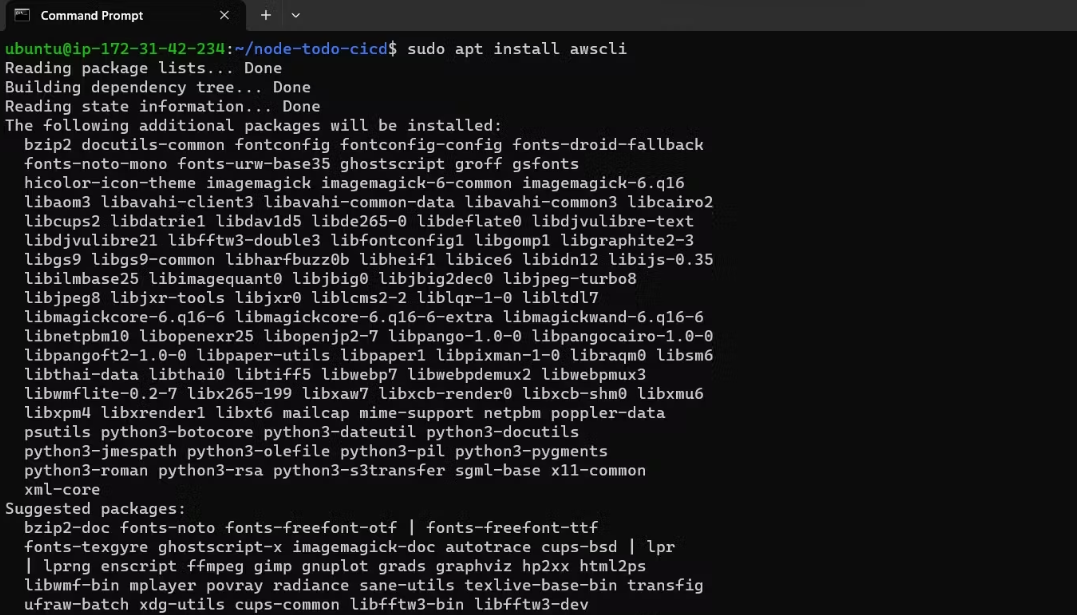
Install the AWS Command Line Interface (CLI) on your EC2 instance.
Configure the AWS CLI to connect your EC2 instance to the AWS Management Console.

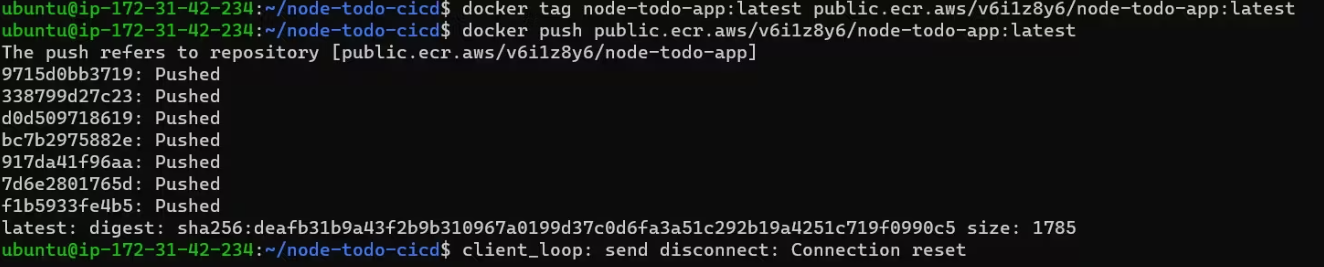
4. Pushing the Image to ECR
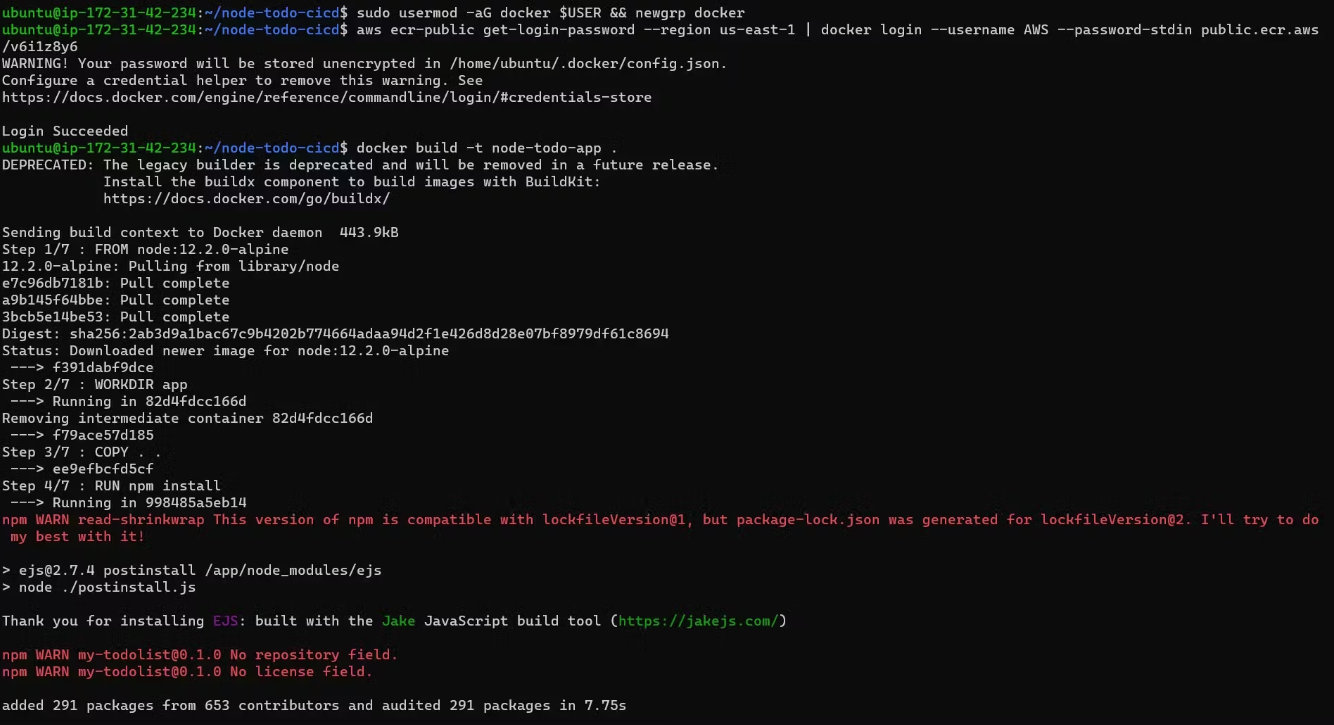
Access the AWS ECR console to obtain push commands for your Docker image.
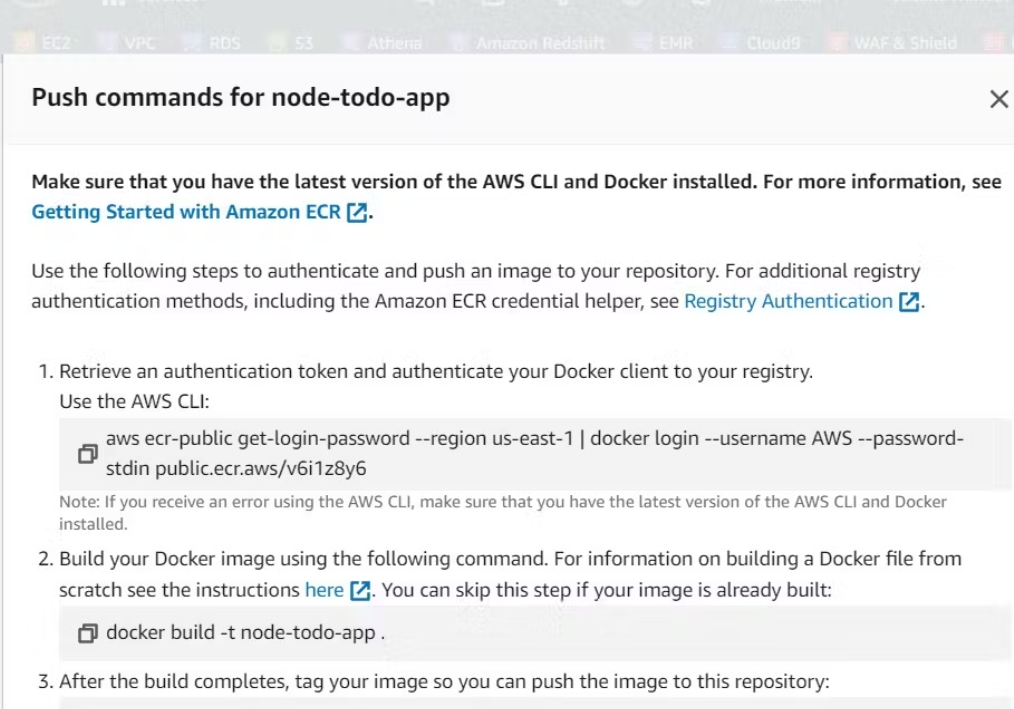
Execute provided commands on your EC2 instance to push the Docker image to ECR securely and efficiently.
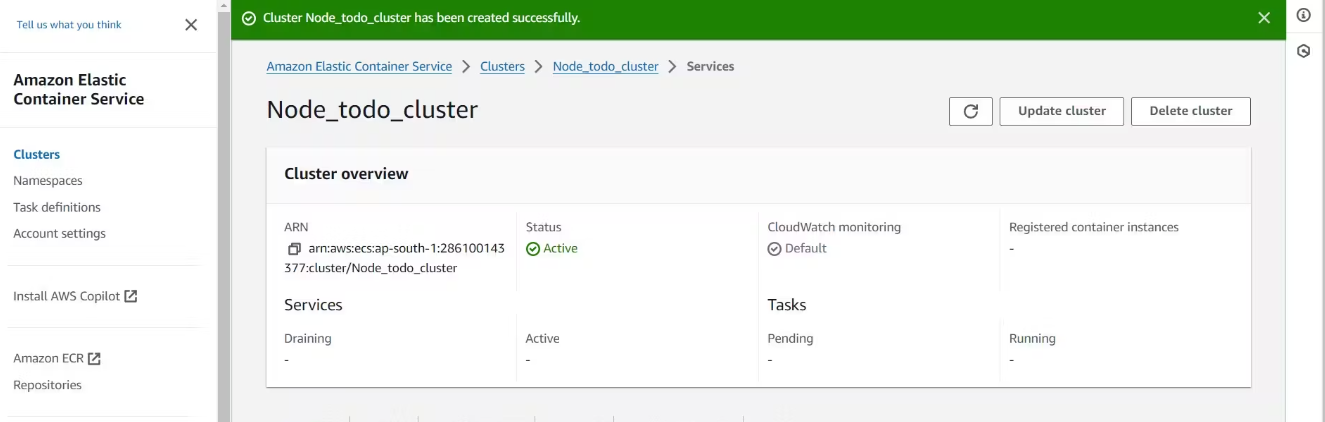
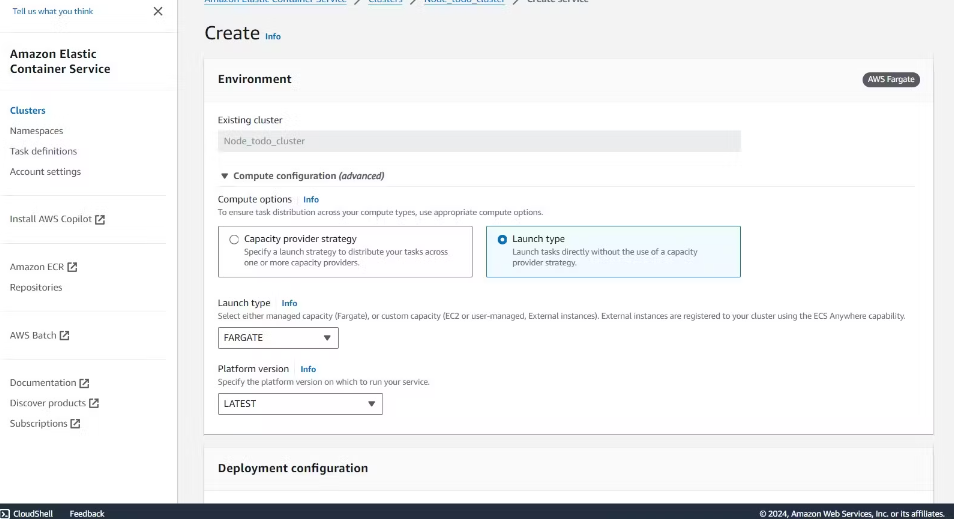
5. Configuring AWS ECS
Navigate to the ECS repository in the AWS Console and create a new cluster.
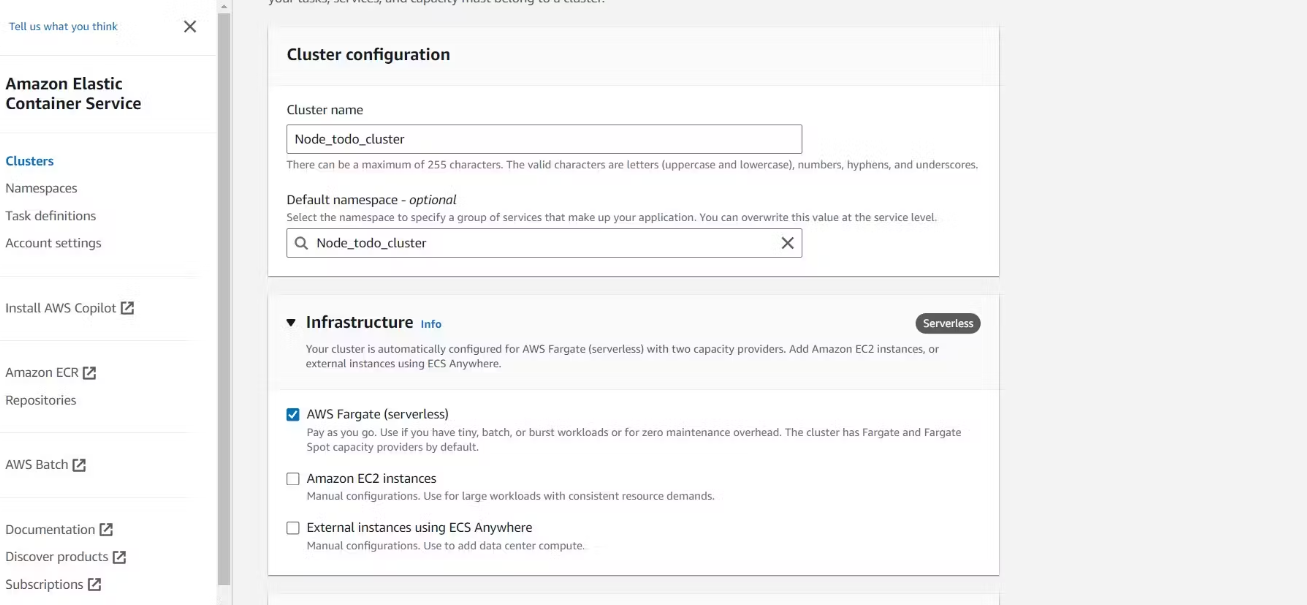
Provide necessary details such as cluster name, VPC, and subnet settings.
Opt for AWS Fargate as the launch type to leverage its serverless capabilities.
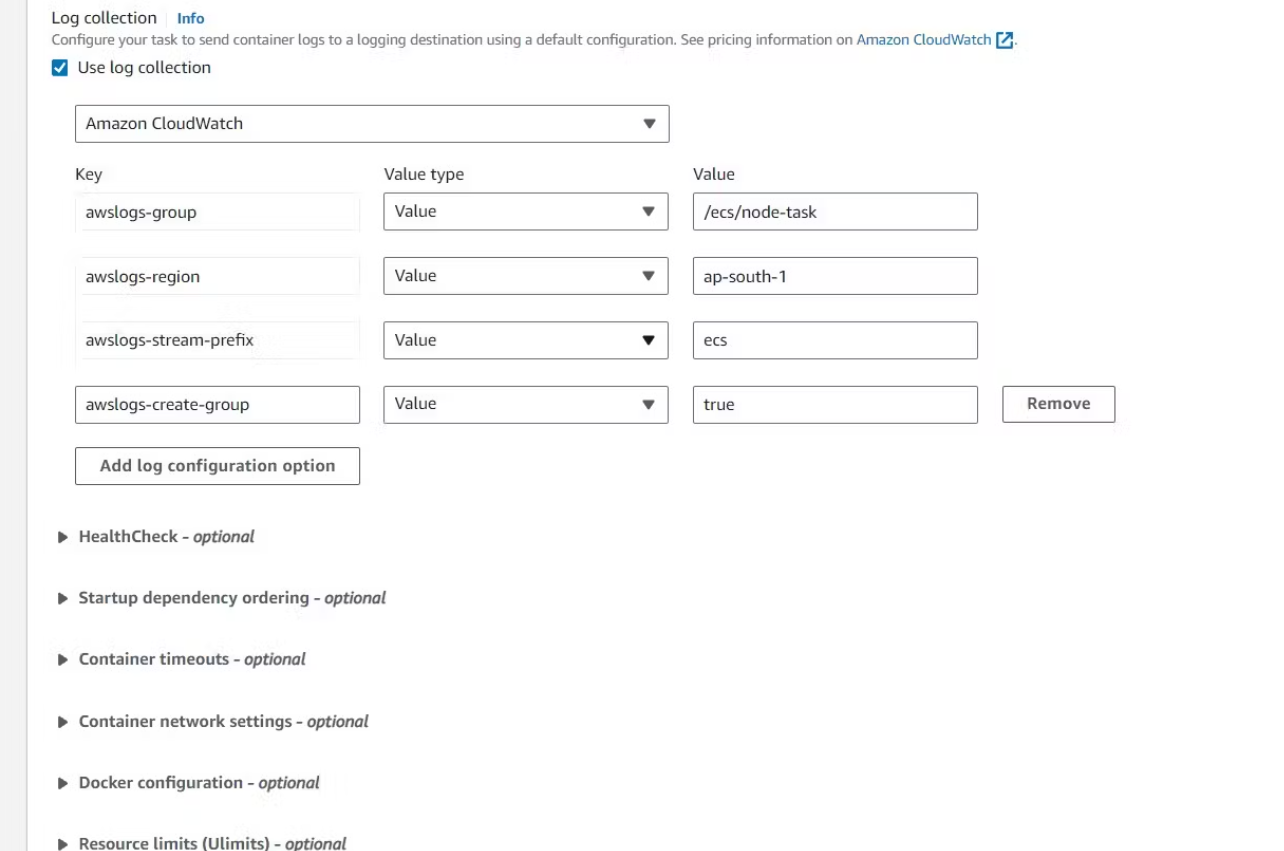
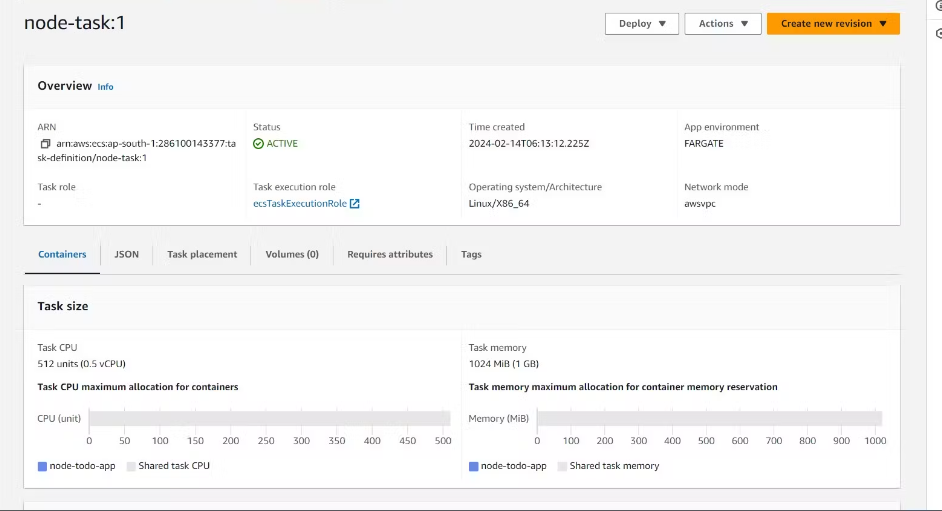
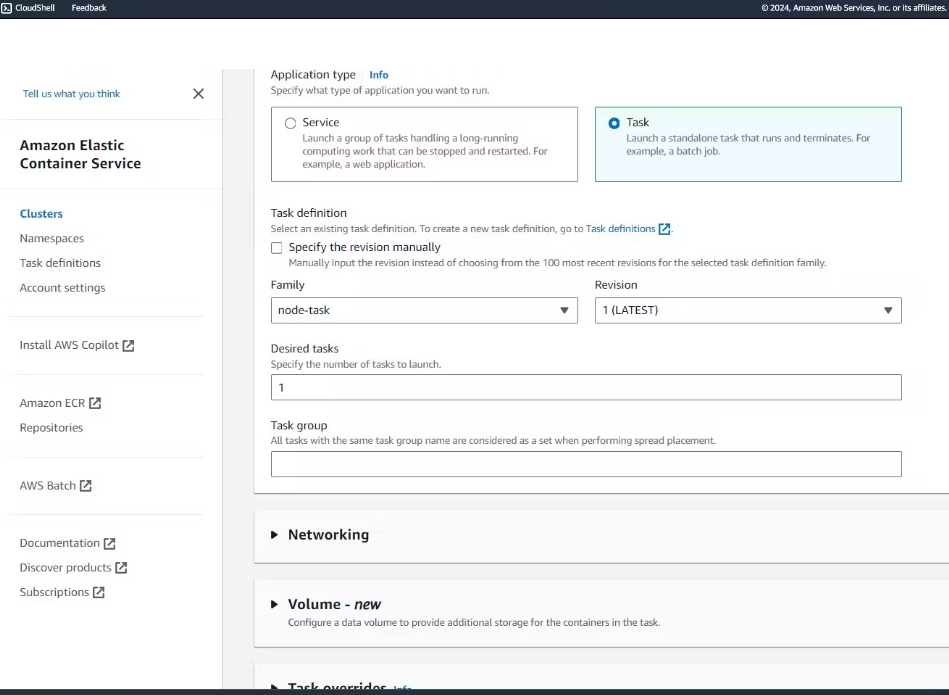
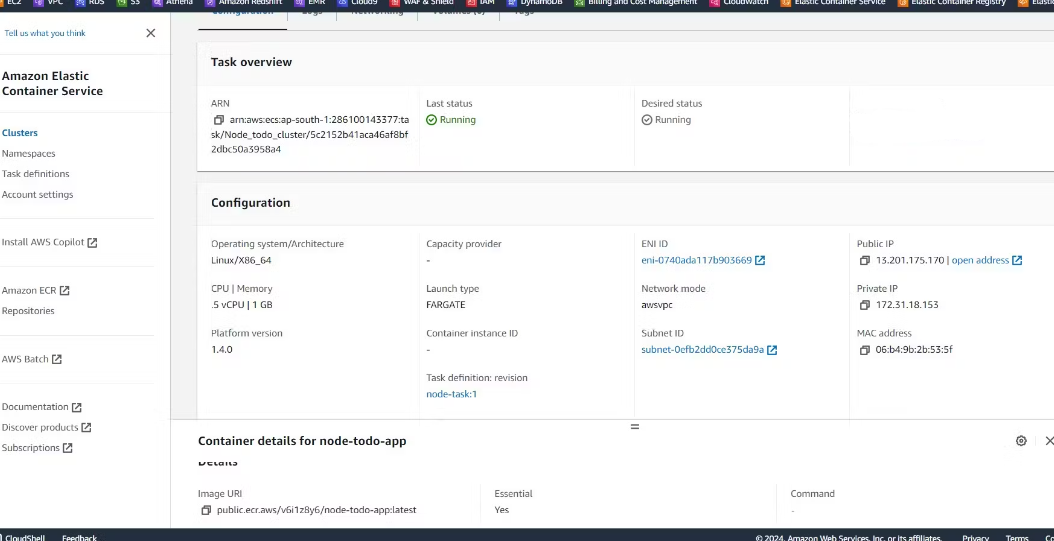
6. Using AWS Fargate
Define a task for your cluster, specifying container image details and required ports.
Configure CPU and memory resources for optimal performance.

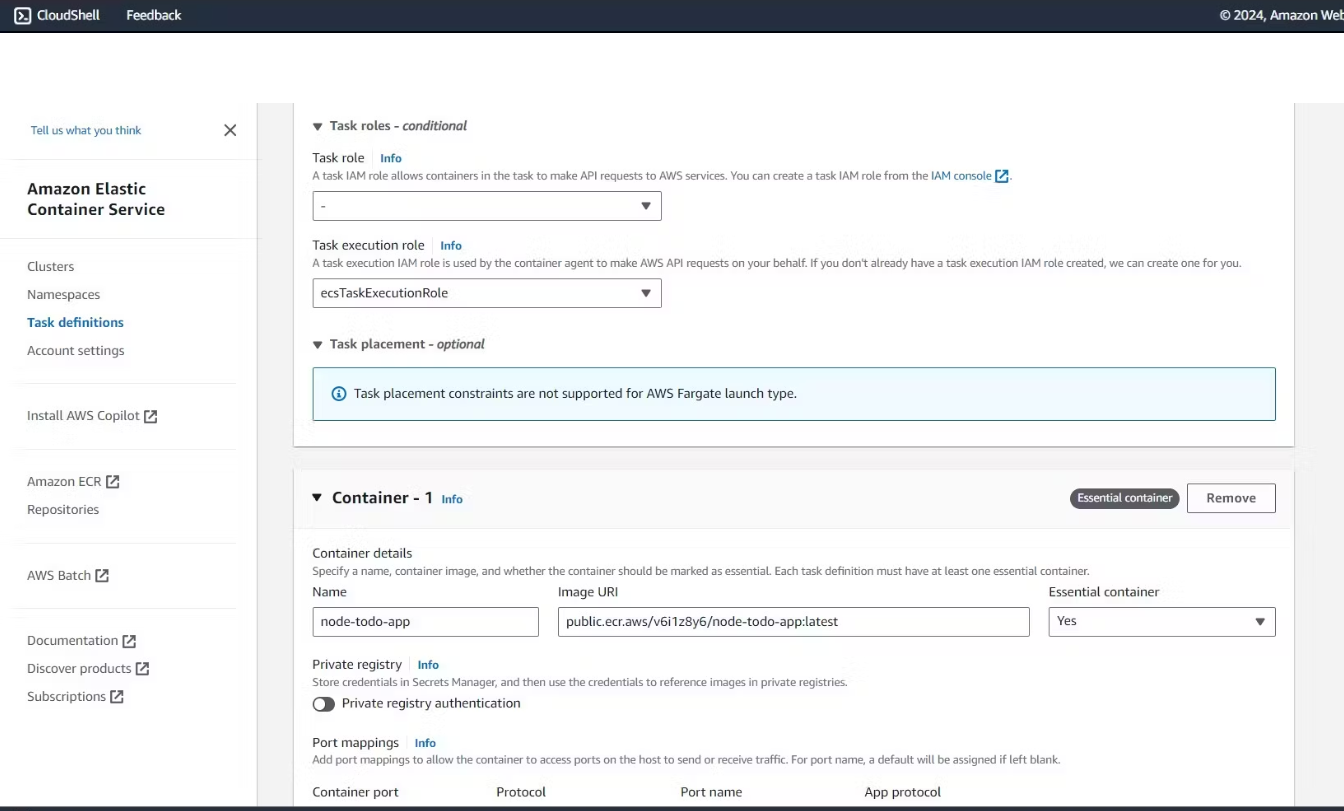
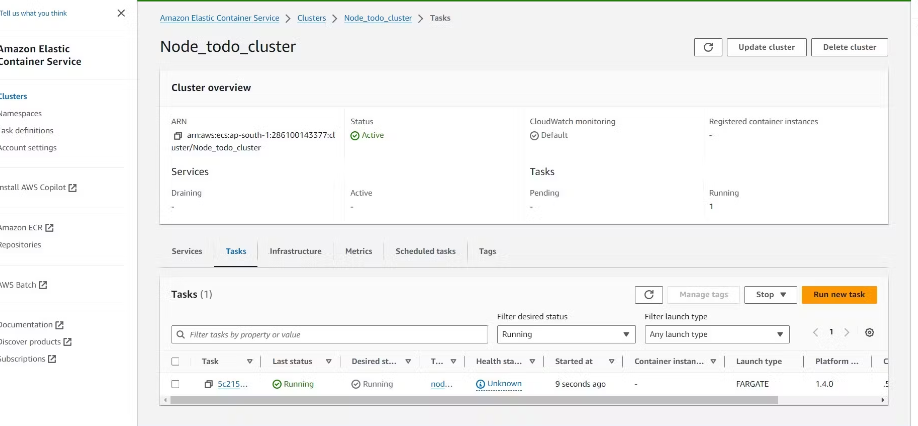
Review details, create the task, and deploy it on the cluster using Fargate's automated management.
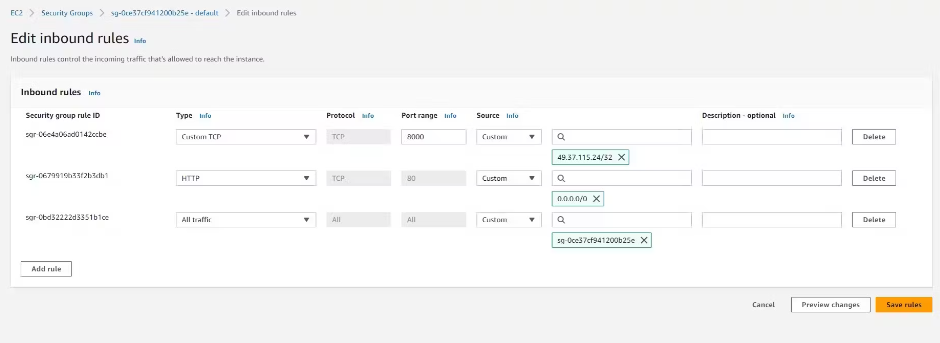
7. Open Port in the Security Group
Navigate to the ENI ID associated with your task and access the corresponding security group.

Modify inbound rules to open Port 80 (HTTP) and restrict access to your IP for enhanced security.
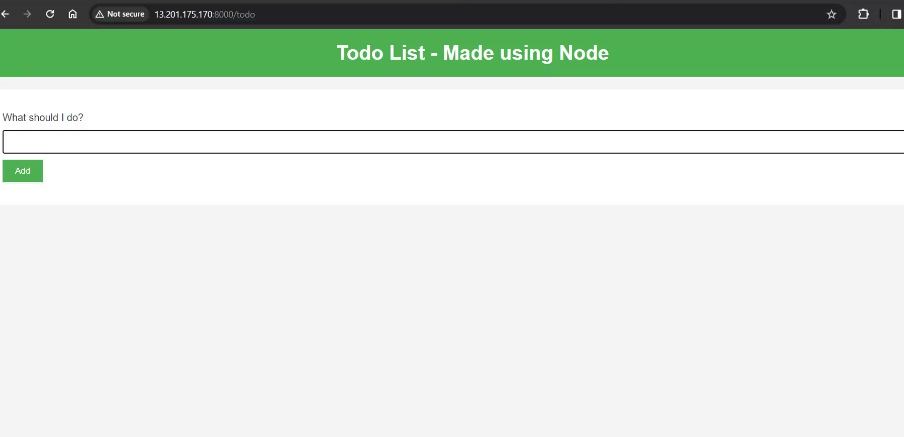
8. Project Live Execution
Retrieve the public IP of the task created earlier.
Access your live Node.js application using the provided IP address, witnessing your deployment in action.
Conclusion 🎉
Congratulations on successfully deploying your Node.js application on AWS ECS Fargate and ECR! By following this comprehensive guide, you've not only accomplished deployment but also gained valuable insights into AWS cloud services. Keep exploring the endless possibilities of cloud deployment and have a fantastic day!
#AWS #ECSFargate #ECR #NodeJS #Docker #CloudDeployment #TechProjects 🌐🛠️✨


