

Hey everyone! Today, I wanted to share with you a recent project I've been working on - automating the deployment process of a web application using Jenkins and its declarative syntax. It's been quite the journey, but I'm excited to walk you through the steps I took to make it happen!
Project Description 📝
So, let's dive right in! The project revolves around automating the deployment process of a web application. Here's a breakdown of what the pipeline includes:
Building, Testing, and Deploying: The pipeline includes stages like building, testing, and deploying to a staging environment. This ensures that our application is thoroughly tested before it goes live.
Running Acceptance Tests: We also incorporated running acceptance tests into our pipeline. These tests ensure that our application meets the necessary requirements before deployment.
Deploying to Production: If all tests pass successfully, the application is then deployed to production. This ensures a seamless deployment process without any hiccups.
Step-by-Step Guide 🛠️
Now, let me walk you through the steps I followed to set up this pipeline:
Step 1: Create an EC2 Instance on AWS 🌐
Logged into the AWS portal and navigated to EC2.
Launched an EC2 instance, choosing an appropriate AMI and instance type.
Configured security settings to allow HTTP and HTTPS traffic.
Created a new key pair and downloaded the .pem file.
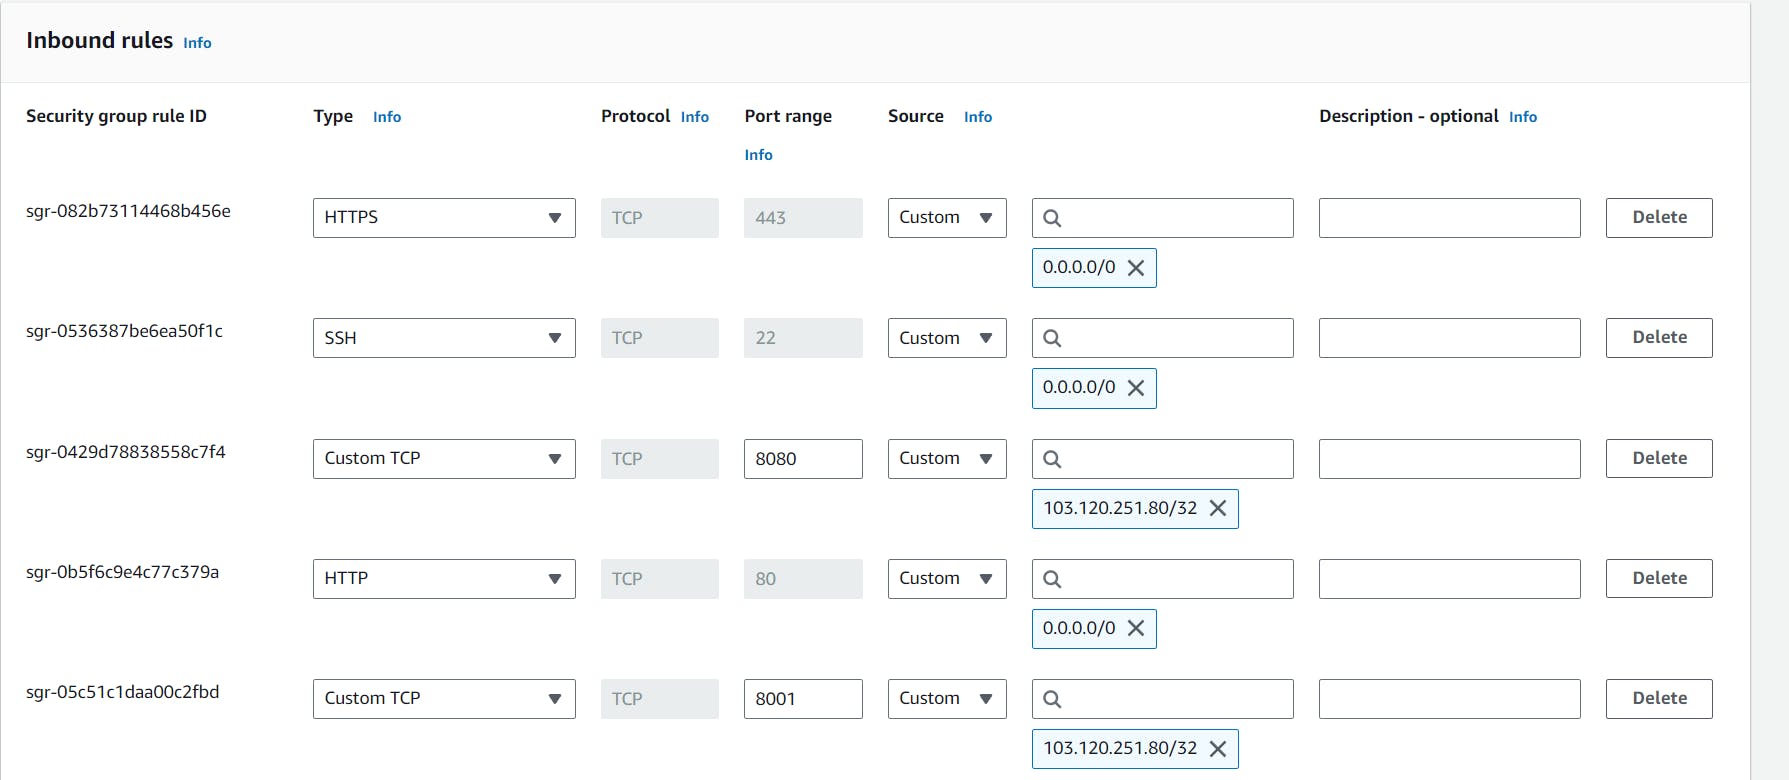
Step 2: Configure Security Groups 🔒
Added inbound rules to the security group associated with the EC2 instance to allow ports 8080 and 8001.
Step 3: Connect to the EC2 Instance 💻
Used SSH to connect to the EC2 instance using the copied SSH command.
Opened a terminal and pasted the SSH command to connect.
Step 4: Install Jenkins 🛠️
- Followed the instructions to install Jenkins on the EC2 instance.
Step 5: Install Docker 🐳
- Ran the command
sudo apt-installdocker.ioto install Docker on the EC2 instance.
Step 6: Verify Installation ✅
- Checked if Jenkins and Docker are installed by running
jenkins --versionanddocker --version, respectively.
Step 7: Create a Jenkins Pipeline 🛠️
Went to the Jenkins dashboard and clicked on "New Item".
Named the project "declarative_pipeline" and selected "Pipeline" as the project type.
Defined stages in the pipeline script for checking out the code, testing, building Docker image, and running the container.

Step 8: Save and Build the Pipeline 💾
Clicked on "Save" to save the pipeline configuration.
Clicked on "Build Now" to trigger the pipeline execution.
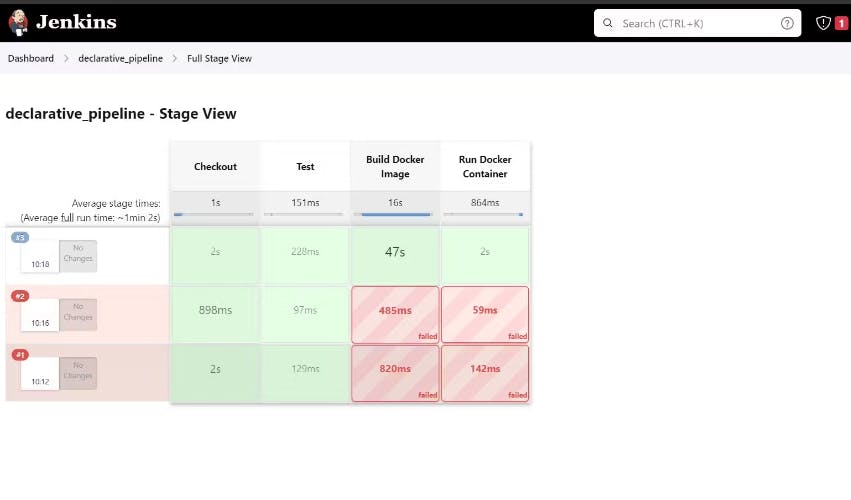
Step 9: Monitor Pipeline Progress 📊
Viewed the pipeline progress by clicking on "Stage View" to check the status of each stage.
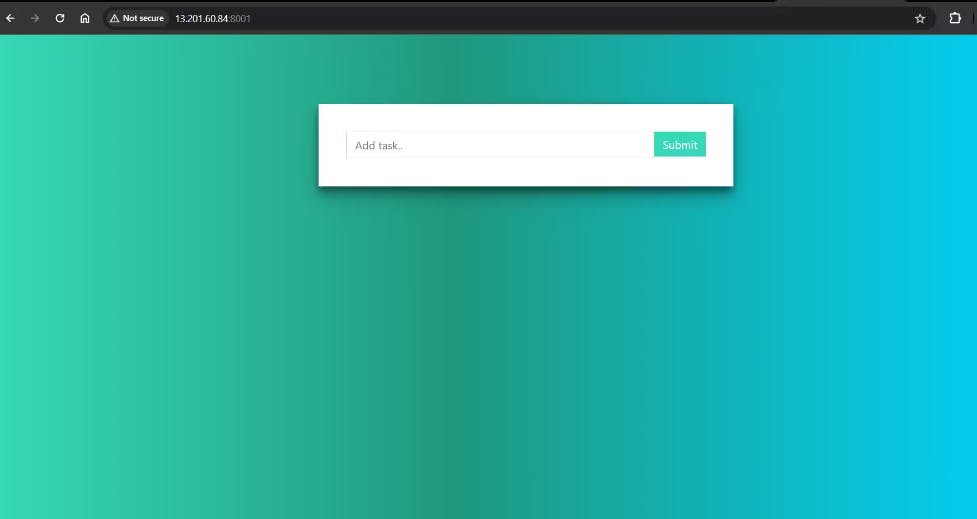
Step 10: Access the Deployed Application 🌐
Once the pipeline execution was successful, searched for the public IP address of the EC2 instance followed by port 8001 in the browser to access the deployed web application.
Wrapping Up 🎉
And there you have it! By following these steps, I successfully deployed a web application using Jenkins CI/CD declarative pipeline on AWS. This process has truly automated the deployment process, making it efficient and reliable. Happy coding, everyone! If you have any questions or thoughts, feel free to drop them in the comments below. 😊👩💻