Yesterday, we delved into the realm of AWS S3 Bucket creation with Terraform. Today, buckle up as we explore the art of scaling our infrastructure with Terraform's magical touch!
Understanding Scaling
Scaling is like a symphony conductor, orchestrating resources to match the tempo of your application's demands. As your app sways between high and low tides of traffic, scaling ensures you have just the right number of resources to keep the show going without a hitch. Terraform shines in this arena, offering a declarative approach to define resources, effortlessly adapting to the ebb and flow of demand.
Task 1: Create an Auto Scaling Group
Auto Scaling Groups are the dynamic backbone of your infrastructure, flexing and contracting EC2 instances as needed. Let's sculpt one:
Define Launch Configuration: In your
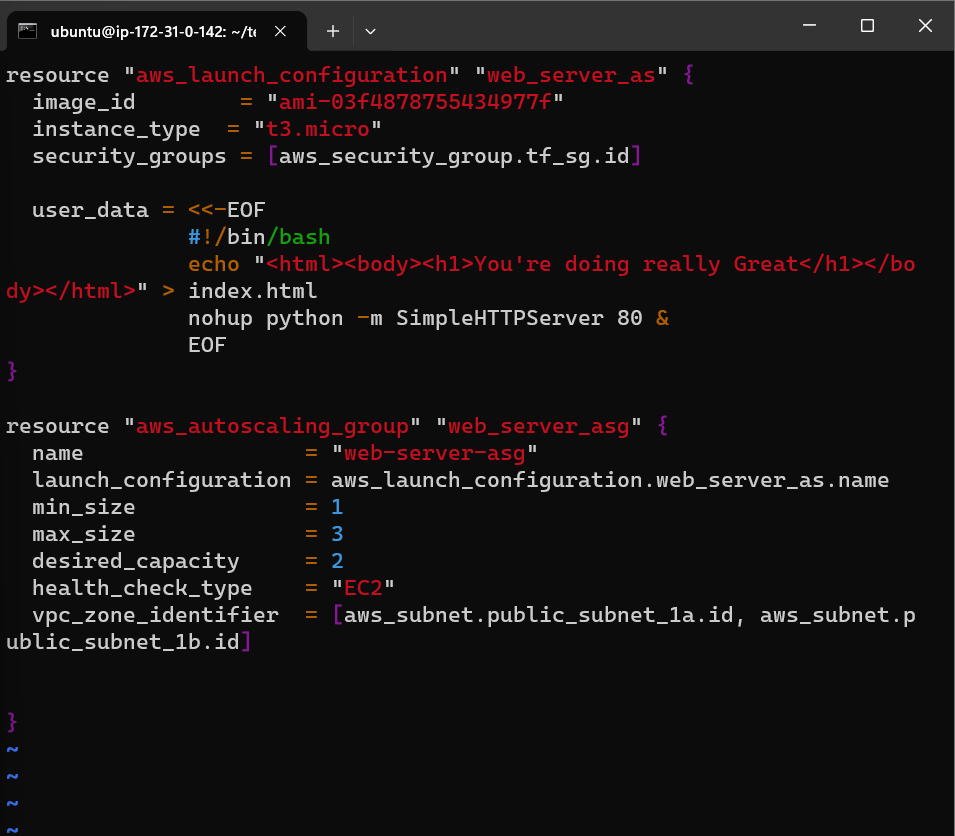
main.tffile, sketch out a launch configuration specifying the image, instance type, security groups, and user data for your EC2 instances.add the following code in main.tf file to create an Auto Scaling Group:

    resource "aws_launch_configuration" "web_server_as" {
      image_id        = "ami-005f9685cb30f234b"
      instance_type  = "t2.micro"
      security_groups = [aws_security_group.web_server.name]

      user_data = <<-EOF
                  #!/bin/bash
                  echo "<html><body><h1>You're doing really Great</h1></body></html>" > index.html
                  nohup python -m SimpleHTTPServer 80 &
                  EOF
    }

    resource "aws_autoscaling_group" "web_server_asg" {
      name                 = "web-server-asg"
      launch_configuration = aws_launch_configuration.web_server_lc.name
      min_size             = 1
      max_size             = 3
      desired_capacity     = 2
      health_check_type    = "EC2"
      load_balancers       = [aws_elb.web_server_lb.name]
      vpc_zone_identifier  = [aws_subnet.public_subnet_1a.id, aws_subnet.public_subnet_1b.id]
    }
Craft Auto Scaling Group: Sculpt an Auto Scaling Group using the launch configuration, setting parameters like minimum and maximum sizes, desired capacity, health check type, and load balancers.
Create a ec2_autoscalling.tf file while contains EC2 configuration along with auto-scaling configurations.

Run terraform apply to create the Auto Scaling Group and all of its dependent resources through terraform as mentioned in the pre-requisites.

Let's navigate to AWS management console to check the created auto-scaling group.

In the auto-scaling terraform configuration we set the desired capacity to 2. Therefore there must be two instances created.

Task 2: Test Scaling
Navigate to AWS Console: Embark on a journey to the AWS Management Console and rendezvous with the Auto Scaling Groups service.
Edit Auto Scaling Group: Select your Auto Scaling Group, perform a symphony of clicks to edit, and tweak the "Desired Capacity" parameter to witness scaling in action.


Witness the Show: Wait patiently as Terraform conducts its magic, spawning or retiring instances as needed.
Verify Instances: Scour through the EC2 Instances service to ensure the right number of instances dance gracefully to Terraform's tune.


Congratulations! 🎊🎉
We've successfully mastered the art of scaling with Terraform. With your infrastructure now dynamically adjusting to the rhythms of demand, you're ready to conquer any challenge that comes your way. Keep terraforming, keep innovating! 🌟🚀 #Terraform #AWS #Scaling #InfrastructureAsCode #CloudComputing 🌐💡
Thank you for reading this Blog. Hope you learned something new today! If you found this blog helpful, please like, share, and follow me for more blog posts like this in the future.
You can connect with me at: https://www.linkedin.com/in/davendersingh/